

DIY Halloween Pinata – How to make Wednesday Addams Spider
Can you make a DIY Halloween Pinata? Homemade pinatas aren't as hard as they might seem.
Now, how about something for a Wednesday Addams party? Why don't we try making a large spider pinata just like little Wednesday breaks open in the Netflix series birthday party flashback.
If you don't know what I'm talking about, here's the clip:
Except when our spider pinata breaks……live spiders DON'T crawl out! Sad, I know. But let's see how to make this spooky pinata and what to put in it instead.

Affiliate links are provided for your shopping convenience. By clicking and purchasing, I may receive a small commission, at no cost to you. But I only recommend products I use and love. Please see my full disclosure page for any questions. Thanks for being here so we can continue providing awesome party ideas that make lives better!
DIY Halloween Pinata Supplies

Spider Pinata Supplies:
- Paper strips: newspaper is great, packing paper, or thin wrapping paper. It needs to be thinner and softer than copy paper.
- 20″ Balloon: This forms the body. Blow it up to the appropriate size. I bought a 20″ clear balloon.
- 12″ Balloon, Any color: for the head. Blow it up to approximately 10″
- Pinata Paste: From “recipe” below
- Black paint: Acrylic paint works great
- Foam paint brushes: They carry them at the Dollar Store as well
- Twine: For the handle
- Duct Tape: To attach handle, close the hole, and reinforce the center
- Black tissue paper: To cover body
- Pipe cleaners: To form legs
- Clear school glue
- Black ribbon 1″
DIY Halloween Pinata Paper Mache

Once you have all your supplies gathered, blow up your balloons to your desired sizes, I did a 20″ body and 10″ head. Now, cut your paper strips and mix up a batch of pinata paste. (see recipe below)
Cover your work surface with paper towels or tablecover. Then, place each balloon into a small/medium bowl for easier maneuvering. This will also catch any dripping paste.
PINATA PAPER MACHE INSTRUCTIONS
Dip each paper strip into the paste and run it between two fingers to remove the excess paste. Lay each strip onto the balloons, taking care to avoid wrinkles. The strips will fall in an arc as they follow the curve of the balloon. Just continue smoothing them down along this pathway, overlapping each strip until you first layer is complete. You will need to change directions and sizes of the strips at the top and bottom of the balloons to ensure total coverage.
Let this first layer dry completely, usually overnight, and continue with another layer – but this time run the strips in another direction to create a cross hatched effect and increase the strength of your pinata walls.
You can add a third or even a fourth layer until the pinata is your desired thickness. Three full layers seems to be just fine as long as you are using a good amount of paste.
DIY Halloween Pinata Spider Body

Now that your layers are done and dried, you will pop both balloons and pull the rubber out of the top hole. It might stick a little – and that's ok if you can't get all the balloon out. Wash your mixing bowl and continue to use it as a stand for the pinata pieces.

Now your spider body is ready for trimming. Cut around the opening to create a smooth hole the same size as your spider head. You may need to adjust as the head will likely be more oval in shape. The further in your head piece goes, the more rounded it will appear.
Fill your Wednesday Addams Pinata
You might not be thinking about the filler quite yet, but with this large hole open at the top of your spider body, it's the perfect time to fill it up with dark Wednesday-esque treasures. I have a whole list of non-candy pinata filler ideas here if you'd like to cut back on the sweet treats. But this is the list of items we included in our Wednesday Addams spider pinata:
- Wednesday Addams vinyl stickers
- Extra dark chocolate Lindor Balls – black wrapper
- Plastic spiders
- Black Foil confetti
- “Thing” mini hands – draw on the stitches with fine tip pen
- Dark chocolate Kit kats – black wrapper
- Glow in the Dark eyeball bouncy balls
You could also include retractable fake daggers as a pinata prize, but I used them on the table as part of the place settings. And if you don't mind more candy – just do a search for “black candy” and you'll have tons of options.
Spider Pinata Attached Pieces

Once you get the pieces in the desired spot use tape to secure them. It takes a lot of patience and lots of small strips of tape to attach a rounded object to another rounded object! Go slow and press the tape into the seams, taking care not to poke all the way through.
Once your vertical strips of tape are done, go around the top and bottom of the seam with some horizontal strips of tape to lock in the edges.

Then, you know the drill! Paste and cover the seam 2-3 times with paper strips – letting fully dry in between.

This is also when you should add the handle for hanging. Attach a piece of twine or ribbon in TWO connection points to increase durability and cover with tape and paper again. I ended up swapping the twine for black ribbon on this one.
Paint and Paper Spider Halloween Pinata
After your neck seam is completely dry, apply a layer of tissue paper to the head for a smooth finish. The paste can make the black tissue paper cloudy however, so I recommend using clear glue on this one – or white tissue paper that you can paint black.
Before adding the tissue paper fringe strips, you'll want to attach the legs. Make sure your bowl is big enough to hold the body off the table so you can properly measure the leg length.
Using black tissue paper, tape pipe cleaners to the inside edge and loosely fold up into a long strip. Glue the edge and press down. Now create a small bend in the leg so it can attach to the body, then create a “knee” joint just above halfway, and finally bend the bottom to create a “foot”. Do this for all 8 legs, slightly adjusting as you go so the center legs are slightly longer than the outside legs.
Glue and then tape each leg onto the body, careful to measure so they are even heights, as well as evenly spaced along the side of the body.
Then start creating your tissue paper fringe strips. This does take a minute, but isn't quite as bad as it first appears. Just make sure you are cutting fringe on SEVERAL pieces of tissue paper at once.
Now, start applying fringe at the bottom of the spider. Using clear school glue paint a strip with a foam brush and gently apply your first strip but putting pressure on the flat, uncut portion of the fringe, then layer your next strip over the top so only the fringe is visible.

You will need to piece around the legs and handle as you go but try to create a consistent line around the body/back/belly for clean fringe. Work your way up until you reach the head, now check the belly and fill in any gaps.

Your Wednesday Addams spider pinata is ready to hang! And don't worry….even if it's not perfect…I guarantee it will be the star of the show!
Side note: You can add fringe to the legs if you'd like it to look more like the pinata in the Wednesday episode, but I preferred them without. I also didn't add eyes. I love the clean look of this spooky spider pinata!
Whack the Spider Pinata

Now comes the moment they've all been waiting for…..and I dread! The moment your creation gets completely destroyed by excited Wednesday fans.
Take turns whacking, we used a broom with a removable handle. You can blindfold, or not. These teens were too cool for blind folds but each dutifully closed their eyes as my husband pulled the spider up and down from the balcony.

And after everyone gets a crack at the pinata, let them keep eyes open and break that thing open!

Label your favor bags with names and hand them out prior to breaking the pinata so each guest can keep their spooky treasure safe. You can see our favor bags and other fun Wednesday Addams party games and activities here.
Do you have what it takes to make a Wednesday Addams spider pinata of your own!? If you try making one, I'd love to hear about it in the comments below. And if you share photos, I want to see it too! Please tag us @partieswithacause on Pinterest, Facebook, and Instagram. We love celebrating all your hard work!
Then join me, your Healthy Hostess for better-for-you holiday and party foods. Grab your free food substitution guide as the first step in your next healthy holiday gathering.
Follow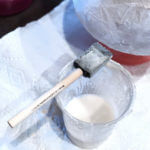
Pinata Paste Recipe
Equipment
- Small mixing bowl
- Metal whisk
- Measuring cups
Ingredients
- 2 cup Regular wheat flour
- 2 cup Warm water
- 1/4 cup Elmer's School Glue
Instructions
- Mix the warm water into the flour, whisking to remove any lumps.
- Add the glue and stir until combined.
- Dip strips of newspaper into paste, pulling between two fingers to remove excess paste.
- Apply each strip to the body of the pinata, overlapping and smoothing the edges of each strip.
- Apply one complete layer at a time and allow to dry fully between layers. If you only do a partial layer, the paste will harden, shrink, and the balloon will bulge out of the open side and lose its shape.
Notes
Pin it for Later

More Wednesday Addams Ideas
DIY Halloween Pinata – How to make a Wednesday Addams Spider Pinata

Ideas for Wednesday Addams Party Games

Recipe for Watermelon Popsicles
Sweet Little Peach Baby Shower Ideas
Peach Sugar Cookie Tart Recipe


0 Comments